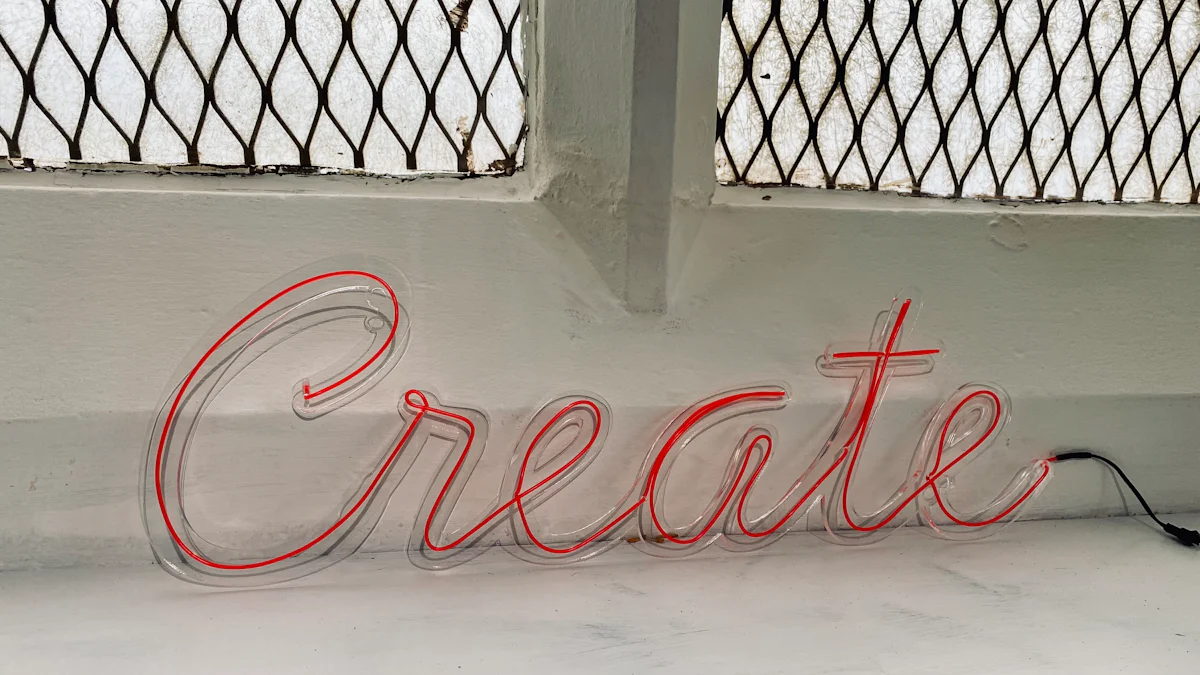
Creating Your Own Personalized Neon Sign: A Step-by-Step Guide
Getting Started with Your DIY LED Neon Sign
If you're considering how to make a neon sign at home, creating your own DIY LED neon sign is a fantastic project to embark on. Before diving into the creative process, it's essential to understand the basics of this endeavor and gather all the necessary materials.
Understanding the Basics of a DIY LED Neon Sign
Before starting your project, there are a few key points to consider. Firstly, it's important to have a clear idea of the design and size of your personalized neon sign. Additionally, understanding how LED neon signs work and the basic electrical components involved will be beneficial.
When it comes to gathering your materials, you'll need to source LED neon flex lights, acrylic or PVC sheets for the sign base, tube cutters for shaping the material, soldering tools for connecting the LEDs, wires for wiring them up, a power source such as a transformer, and a hot glue gun for securing components.
Planning Your Project
Setting clear goals for your project is crucial. Consider factors such as where you intend to display your finished DIY LED neon sign, whether it's for personal use or as a gift, and any specific design elements you want to incorporate. Sketching out your design can help visualize the end product and ensure that you stay on track throughout the creation process.
By understanding these fundamental aspects and planning meticulously, you'll be well-prepared to dive into the exciting world of crafting your very own personalized neon sign.
Designing Your Personalized Neon Sign
Now that you have a clear understanding of the basics and have gathered all the necessary materials, it's time to delve into the exciting process of designing your personalized neon sign.
Choosing the Right Materials for Your Neon Sign
When it comes to creating a DIY LED neon sign, one of the crucial decisions you'll need to make is choosing the right materials. The first consideration is whether to use acrylic or PVC sheets as the base for your sign. Acrylic is known for its durability and clarity, making it an excellent choice for indoor signs. On the other hand, PVC sheets are more flexible and suitable for outdoor use due to their weather-resistant properties.
Next, selecting the appropriate LED neon flex lights is essential in achieving the desired look for your sign. These lights come in various colors and styles, allowing you to customize your sign according to your preferences. Whether you opt for a vibrant color or a classic white glow, there are plenty of options available to bring your vision to life.
Creating a Custom Shape and Design
Once you've chosen your materials, it's time to bring your design to life by creating a custom shape and layout for your DIY LED neon sign. Using tube cutters, carefully cut and shape the acrylic or PVC sheets according to your desired dimensions. This step requires precision and attention to detail to ensure that your sign takes on the perfect form.
With the base material prepared, it's now time to map out the placement of the LED neon flex lights. Consider how you want the lights to flow within your design, whether it's outlining specific letters or shapes or creating intricate patterns. Mapping out the placement beforehand will help streamline the assembly process later on.
By carefully considering these aspects during the design phase, you'll be well-equipped to move on to assembling your personalized neon sign with confidence.
Assembling Your DIY LED Neon Sign
Now that you have meticulously designed your personalized neon sign and gathered all the necessary materials, it's time to move on to the exciting phase of assembling your very own DIY LED neon sign.
Preparing the Acrylic and Backings
Machining and Painting
The first step in preparing the acrylic for your DIY LED neon sign involves machining and painting. Using precision tools, carefully machine the acrylic or PVC sheets to ensure they align with your custom design. Once machined, it's time to apply a vibrant coat of paint if you desire a colored background for your sign. This step adds an extra layer of personalization to your creation.
Applying Vinyl for a Polished Look
For a sleek and polished finish, consider applying vinyl to the surface of the prepared acrylic. The vinyl not only enhances the visual appeal but also provides an additional layer of protection for your personalized neon sign. Take your time during this process to ensure that the vinyl is applied smoothly and free from any air bubbles, resulting in a professional-looking finish.
Fitting LEDs and Final Assembly
Soldering and Wiring
With the prepared acrylic and backings at hand, it's time to focus on fitting the LED neon flex lights onto your sign. Carefully solder each light according to your design layout, ensuring a secure connection between each component. Attention to detail during this stage is crucial as it directly impacts the functionality and longevity of your DIY LED neon sign.
Securing Components with a Hot Glue Gun
Once all the LEDs are in place, use a hot glue gun to secure them firmly onto the acrylic or PVC base. The hot glue provides added stability and ensures that the lights remain in position even with regular handling or movement of the sign. Take care not to apply excessive amounts of glue, as neatness is key in achieving a professional final result.
By following these steps diligently, you'll be well on your way to completing the assembly of your personalized neon sign, bringing you closer to witnessing its vibrant glow come to life.
Finishing Touches and Displaying Your Neon Sign
Now that you've completed the assembly of your DIY LED neon sign, it's time to add the finishing touches and find the perfect spot to display your vibrant creation.
Testing Your Neon Sign
Before proudly showcasing your personalized neon sign, it's crucial to conduct thorough testing to ensure its functionality and longevity.
Conducting a Three-Hour Test
Once your neon sign is fully assembled, initiate a three-hour test to gauge its performance. This duration allows for comprehensive observation of the lights' consistency, brightness, and any potential issues. During this period, monitor the sign closely to identify any irregularities or fluctuations in the lighting.
Quality Control Checks
Following the initial test, perform quality control checks to verify that all components are securely in place and functioning as intended. Inspect the soldered connections, LED placements, and overall structural integrity of the sign. Address any discrepancies promptly to guarantee a flawless end result.
Mounting and Displaying Your Neon Sign
With successful testing and quality assurance complete, it's time to mount and proudly display your personalized neon sign for all to admire.
Choosing the Perfect Spot
Selecting an ideal location for your neon sign is essential in maximizing its visual impact. Consider areas with adequate visibility and minimal obstructions where your creation can shine brightly. Whether it's adorning a wall in your living space or enhancing the ambiance of a commercial establishment, choose a spot that accentuates the unique allure of your neon masterpiece.
Installation Tips
When installing your neon sign, prioritize safety and precision to achieve optimal results. Use appropriate mounting hardware suitable for the weight and dimensions of your sign. Ensure secure attachment to prevent accidental dislodging or damage. Additionally, consider ambient lighting conditions to complement the radiance of your neon creation effectively.
Incorporating these installation tips will not only enhance the visual appeal but also contribute to maintaining the longevity of your personalized neon sign.
By meticulously conducting tests and thoughtfully selecting its display location while adhering to proper installation techniques, you'll ensure that your DIY LED neon sign becomes a captivating focal point wherever it is showcased.
Wrapping Up
As I reflect on the journey of creating my personalized neon sign, I am filled with a sense of accomplishment and pride. The DIY process has been an incredibly rewarding experience, allowing me to unleash my creativity and bring a unique vision to life.
Reflecting on the DIY Process
Sharing Personal Experiences
Throughout this DIY endeavor, I encountered moments of inspiration, challenges, and triumphs. From meticulously designing the layout to carefully assembling each component, every step was an opportunity for learning and growth. The satisfaction of witnessing the vibrant glow of my completed neon sign is truly unparalleled.
Encouraging Others to Try
I wholeheartedly encourage others to embark on their own DIY LED neon sign projects. The sense of fulfillment that comes from crafting a personalized creation is incomparable. Embracing the process with an open mind and a willingness to learn opens doors to endless possibilities in design and self-expression.
Maintenance and Care Tips
Keeping Your Neon Sign Bright
To ensure that your neon sign continues to shine brightly, regular maintenance is key. Dusting the surface gently with a soft cloth helps preserve its luminosity, while avoiding exposure to direct sunlight can prevent fading over time.
Long-term Care Strategies
In addition to routine cleaning, implementing long-term care strategies can prolong the lifespan of your neon sign. Periodically inspecting the connections and ensuring they remain secure is essential for uninterrupted functionality. Furthermore, storing your neon sign in a cool, dry environment when not in use safeguards it from potential damage or discoloration.
By embracing these maintenance practices, you can relish in the enduring radiance of your personalized neon sign for years to come.
In conclusion, embarking on the journey of creating a DIY LED neon sign has been an enriching experience that has allowed me to explore my creativity while acquiring valuable skills along the way. As I proudly display my vibrant creation, I am reminded of the joy that comes from bringing imagination to reality through hands-on craftsmanship.
See Also
Crafting Your Own Personalized Neon Signs: A Complete How-To
Designing Your Own Custom Neon Signs: A Step-By-Step Guide
Creating Your Own Custom Neon Signs: A Must-Have DIY Guide
The Benefits and Steps of Custom Neon Sign Creation: A Comprehensive Manual
Personalizing Your Space with Custom Neon Sign Design: Expert Tips

About US
Follow Us
Rebow was founded in 2014 which is a company dedicated to creating high-end neon art in the world.With over 5000 square meters dust-free workshop, automatic production lines, modernized equipments and 100 employees,20 engineers, 30QC etc.qualitified work team.
Address
Address:1608,Unit C,No.37,west gemstone road,longteng community ,shiyan street ,bao an district ,shenzhen,China
Contacts
sales02@rebowsigns.com
WhatsApp:+86 18038005211